


In this article, we will create a bot that automates your message and sends them automatically and on time as long as you need, even if your network is down or unavailable.
To jump on this tutorial, you need the following.
Perquisite
Twilio account
Git Account
Code Editor of your choice — VsCode
Heroku — Free cloud hosting Service account
PIP — Python Installed
Twilio
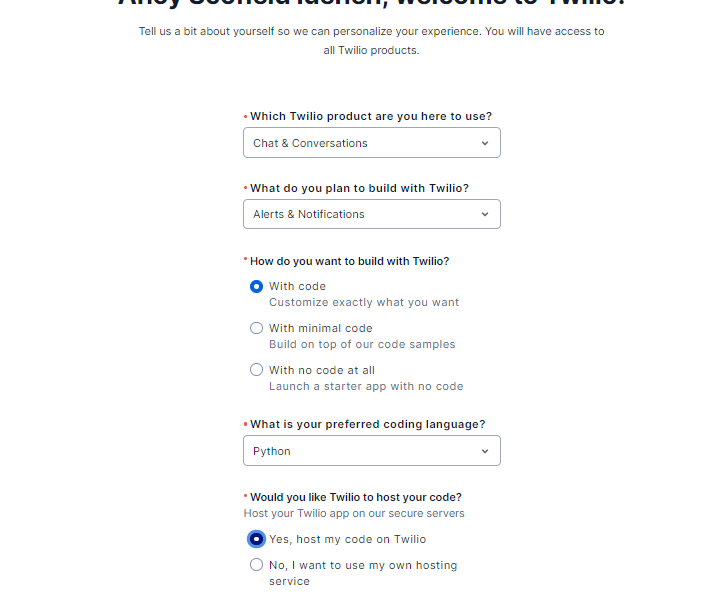
Click on the link to get started and register on Twilio. If you do not have an account, after installing, it will authenticate your account and ask you to fill this.
After filling out our form and logging in, open your file folder and create a new folder. If you want to be fast, open your terminal and cd into your preferred location like this.
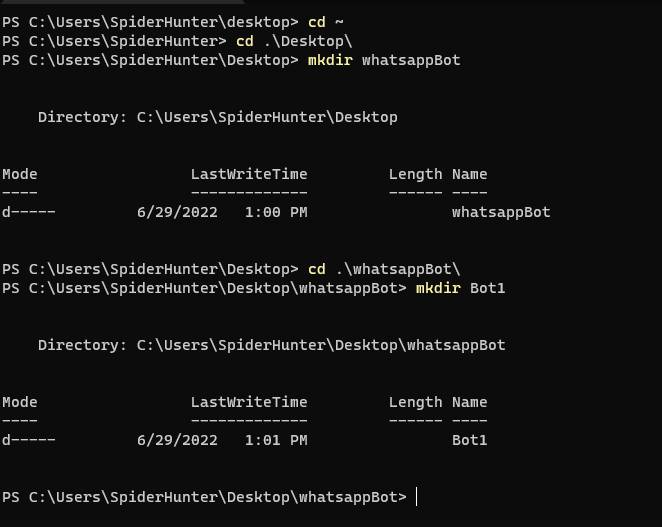
First, cd desktop to go to the desktop directory, then create a new folder by running mkdir whatsappBot, create another folder called Bot1 inside the whatsappBot.
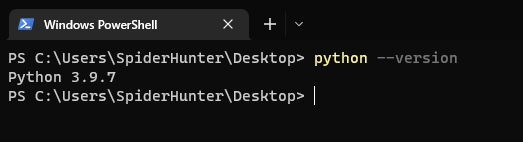
Next, we are going to test if we have python installed by running python — version
From this point, we will be using the terminal on Vscode, you can find the terminal of Vscode here.
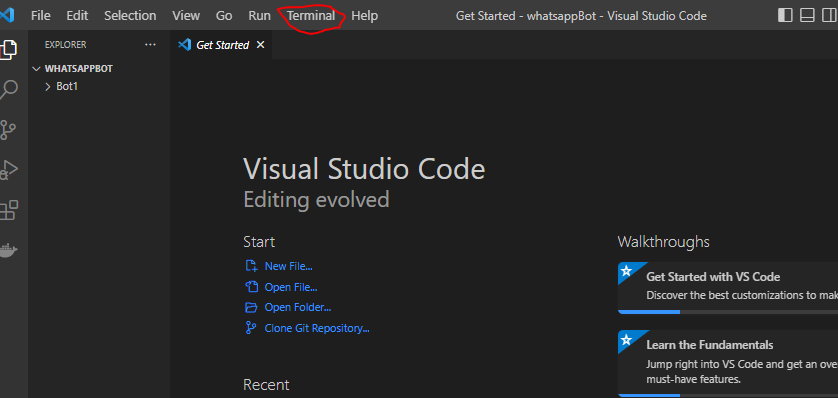
Make sure you navigate to the Bot1 folder when you open your Vscode and click on a new terminal.
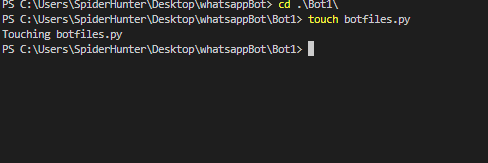
Next, we are going to create a python file where we will write our codes, notice that I used a command called touch and the name of the file, if your system throws an error that it does not recognize touch, run npm install touch-CLI -g this will install the dependency and you can use touch now.
You should be able to see the new file in your folder with an extension of .py
Now we need to go back to the Twilio dashboard when you log in, click on develop on the left side, scroll down to messaging and click on send a WhatsApp message.
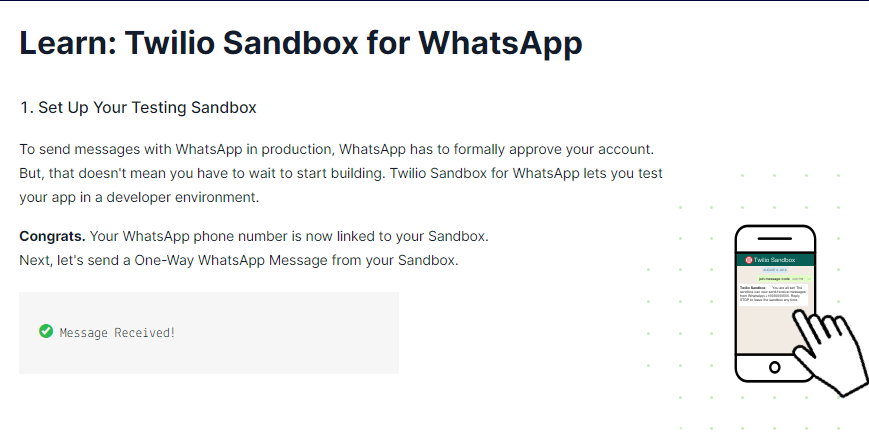
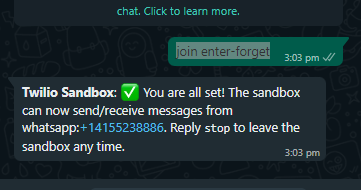
You will be asked to run this join enter-forget to a number on WhatsApp to activate your sandbox, if you do that correctly you should see this.
Next, we send a one-way message to test out the bot if we can send messages from Twilio to our number.

Using Our Local Machine
We are going to run our bot from our command line and not from Twilio.
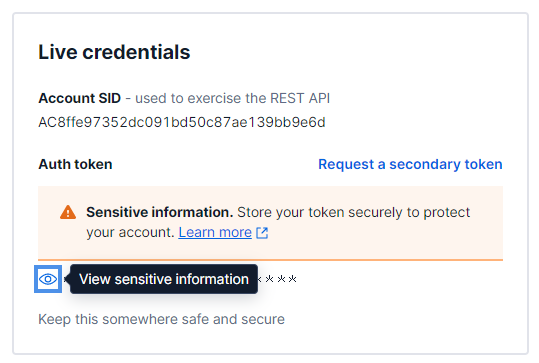
Copy the codes and paste them on your code editor on the left and make sure to click on show Auth Token and python.

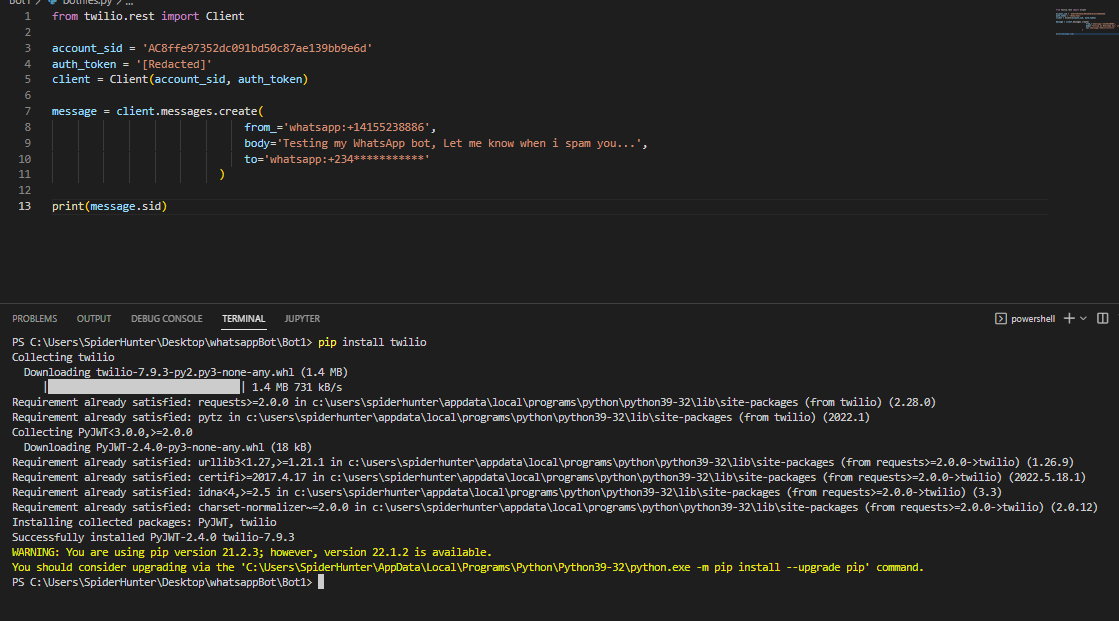
Next, we are going to install the Twilio library in vscode so we can do all the above with codes, pip install twilio but don’t get confused, if you have installed python, pip comes with it so you don’t have to install it again.
Let’s test our bot from our local machine and see if it will work.
First we must change put in the correct recipient number in the To
Next we must change the auth_token id to the live token, you can get your live token from your dashboard by clicking on account and API keys and Tokens make sure you copy the live token and not the test token.
Next, we need to create a scheduler that handles the timing our message hits our targets, click here to follow the guild.
pip install apscheduler
After installing, create a new schedule.py file and populate it with this, make sure to check for indent error.
from apscheduler.schedulers.blocking import BlockingScheduler
from botfiles import love
sched = BlockingScheduler()
sched.add_job(love, 'interval', seconds=2)
sched.start()
From apscheduler.schedulers.blocking import BlockingScheduler we imported the Blockingscheduler.

Next, we defined a new function in our botfiles.py and imported the function to our new schedule.py
We created a new variable of BlockingScheduler()
we added the job and called our function sched.add_job(love, ‘interval’, seconds=2) and specify how long we want our bot to wait before it sends a message again.
sched.start()
Our bot begins.
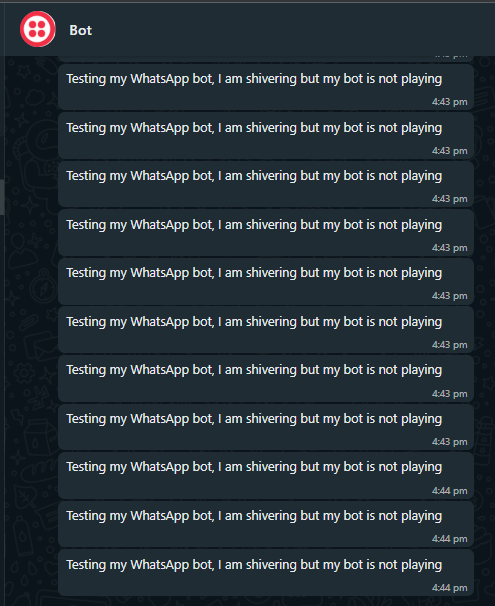
At this point, if we test our bot we notice a ton of messages every 2 seconds and this is spamming, you can increase the time length but I just wanted to show you how reliable our bot can be.
Deploy your bot on the Cloud
We have succeeded in automating the process of our bot sending messages, but what if we are offline and we can not start the process or our local machine shuts down, we are going to deploy the application on the cloud.
Click here to signup or log in if you already have an account.
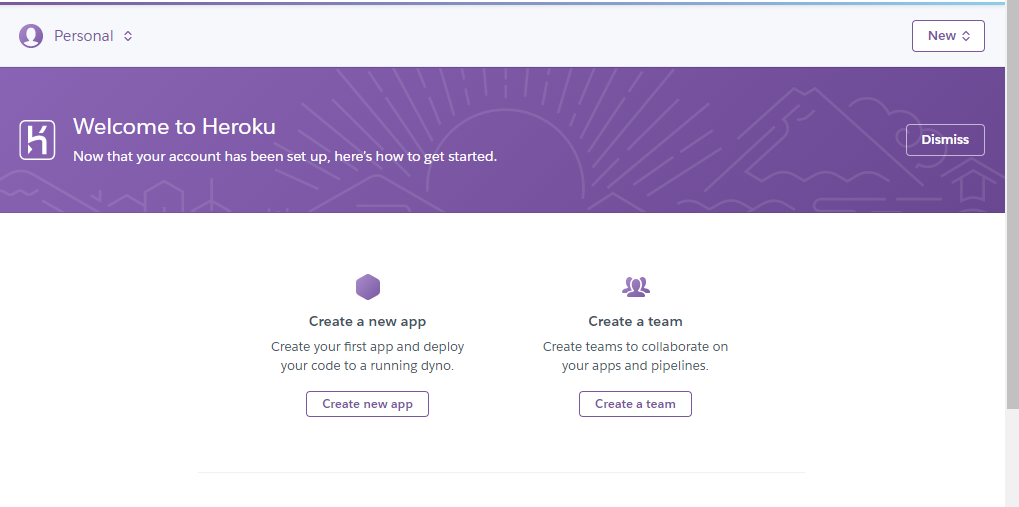
Click on Create a new app

Specify the name of the application and choose the region, suggest you use the United States. click on create an app and the steps to follow to use Heroku will be shown to you.
Click on download and install Heroku CLI, and follow the requirement for your OS.
After installing, login to your Heroku account from your command line heroku login we need to do two things, first, we need to create a requirement file where we will tell Heroku what dependencies to install and run for our bot to work.
Let us go back to Vscode and create these files.
First, we create the requirement.txt file and add the following dependencies
twilio == 6.35.0
APScheduler == 3.6.1
Next, we will create a file called Procfile, please make sure the first P is a capital letter and we will add the name of the scheduler as the file we want Heroku to run.
appscheduler : python appscheduler.py
Now you should have four files inside your folder, we will now use go back to our terminal and add all of the files to the Heroku server.
First we initialize the folder with the code git init
Next we set our remote host to our app heroku git:remote -a bot9ja check the heroku page after creating the app and copy directly.
Next add all the files to source control by using git add . the dot makes sure we add all the files.
Next we commit our files with git commit -am “make it better” and this set them ready to be deployed.
Finally we push our codes with git push heroku master
Conclusion
In this article, we saw how to build a Whatsapp bot using Twilio, appscheduler, and host it on Heroku.
If you have any issues working on this please feel free to send me a message, or check out these resources for reference.